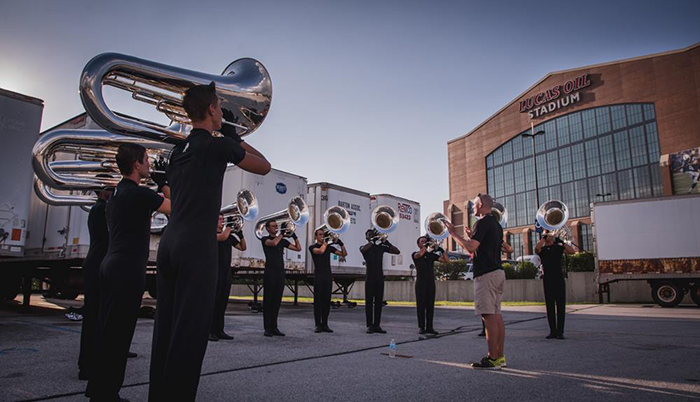
What is the most revered individual musical quality? Overwhelmingly, the answer is sound, or tone quality. Just like our voice, our tone defines us. It does not matter how high you can play, how fast you can tongue, or how many excerpts you know – if you sound bad doing it all, nobody will care. This is why as an educator I am in a continual, never-ending pursuit for the best tone quality from my students.
For brass students, many aspect of superior tone can be developed away from the instrument – today I’ll share some that you can use with your students. By no means is this information intended to be a comprehensive pedagogical resource! My goal is to simply introduce a few concepts and techniques to start the conversation.
Concept of Sound
The creation of quality brass tone always begins in the mind – not at the the lips. For both the teacher and the student an ideal concept of sound must first be realized. While this concept of sound can be detailed over time, it should be inspired by the following:
- Focused, repeated listening (recordings, live music, etc.)
- Experimentation on the mouthpiece/instrument
- Teacher/colleague input
- Personal experience
- Personal taste
Once this “mental picture” of the sound has been established, both teacher and student can start working together to focus in on the desired sound. If you are not a brass player and you are unsure about a brass-specific concept of sound, talk with private lesson teachers, local master teachers, or clinicians in your area to help.
Non-inclusive list of recommended musicians to listen to:
Trumpet: Maurice Andre, Wynton Marsalis, Bud Herseth, Wayne Bergeron
French Horn: Dale Clevenger, Radek Baborak, Sarah Willis, Philip Myers
Trombone: Joseph Alessi, Christian Lindberg, Jay Friedman, Ian Bousfield
Bass Trombone: Charles Vernon, Douglas Yeo, George Roberts
Baritone/Euphonium: Steven Mead, Trevor Groom, David Childs, John Clough
Tuba: Gene Pokorny, Oystein Baadsvik, Roger Bobo, Alan Baer
Vowel/Oral Shape
While there are varying philosophies on vowel (or oral) shape, the default vowel shape I ask brass students to utilize is the “oh” vowel shape. I like this shape because I believe it is the easiest to understand and it promotes healthy, consistent habits beneficial to the entire brass instrument family.
The “oh” vowel shape helps us by:
- Creating space between the teeth.
- Creating space at the back of the throat.
- Relaxing the tongue position down (and softening the tongue texture!).
- Relaxing the jaw.
- Relaxing the soft palate.
Brass students should use this vowel shape through all processes: breathing, singing, buzzing, and playing the instrument. For more advanced players it might be necessary to change the vowel shape to facilitate certain register changes or slurred passages. Vowel shapes like “ah”, “ih”, “eh”, or “ee” can and should be used as needed, but only after the fundamental vowel shape of “oh” has been successfully established.
Breathing
Most brass players and teachers would agree that a central tenet of creating a characteristic brass sound involves proper breathing and airflow. Arnold Jacobs, renowned former tubist for the Chicago Symphony Orchestra, was a pioneer in the art of breathing as it relates to playing. The Breathing Gym book, developed by tubists Sam Pilafian and Patrick Sheridan, is also a fantastic resource for the young brass student or teacher.
Here are some basic goals all students should work to achieve as they practice their breathing:
- Maintain the “oh” vowel shape on the inhale, exhale, and at the turnaround.
- The inhale and exhale should always feel free-flowing.
- Conceptually, breathing should feel very circular and constant.
- The turnaround of the air should be relaxed, but without hesitation or bumps.
- Air should feel cool on the inhale, warm on the exhale.
- During the inhale air should feel as if it is filling from the bottom-up – visualize the “full body breath”.
- Use the formation of an embouchure as you transition to the mouthpiece or instrument.
▪ Check that the quality and volume of your air stays consistent.
▪ Check that your body and face stay relaxed. - Minor expansion and deflation as a result of the inhale and exhale is acceptable, but avoid extraneous movement (especially in the face, shoulders, or legs…it is often a sign of tension).
- When possible, exhale before starting a new inhale.
Before playing, students should practice breathing patterns or exercises in order to “warm-up” the lungs and the supporting muscles; however, breathing should never be isolated to just the beginning of a lesson! Explore creative ways to incorporate breathing exercises mid-lesson to help keep focus in the rehearsal, address breathing deficiencies in the context of the music, or address specific musical challenges like length-of-phrase, dynamics, entrances, releases, tempo, etc.
While there are many exercises readily available online and in books, the most basic exercise involves variations on 1, 2, 3, and 4 count sequences.
- In 4-Out 4
- In 3-Out 3
- In 2-Out 2
- In 1-Out 1
- Sequence towards In 1-Out 7 and In 7-Out 1
Once you decide to pick up the instrument, a very effective and easy method of simulating (and overtraining) proper airflow is to allow the student to “wind horn” or “air and valve” their part. This helps remind the student to be directional with their airflow (not at, but through the instrument) and allows the student to evaluate the quantity and quality of their air in context with the instrument.
Buzzing
At the Cavaliers Drum and Bugle Corps and at my own band program we utilize buzzing on the mouthpiece (aka “lip vibrations”) as a daily technique to help condition the muscles of the embouchure, to increase listening and aural skills, and to develop tone! While buzzing is controversial in some circles, the benefits far outweigh any potential negatives as long as there is proper oversight and instruction.

The primary benefit of buzzing is that it allows you to completely focus on the vibration and sound! This removes the following inherent challenges of attempting to develop tone on the instrument:
- Resistance of the instrument.
- Pitch-placing tendencies of the harmonic series/instrument.
- Finger or slide positions.
- Physicality/distraction of holding the instrument (younger students).
NOTE: when buzzing, the use of a device that generates a pitch is a must-have tool! The Tonal Energy application is popular for iOS and Android.
I often use the term vibrational efficiency to describe the goal of the buzz. I like this term because I believe it helps remind the student that a healthy relationship between the air, embouchure, and vibration is crucial to achieve a characteristic sound. All three of these elements must work in harmony with each other – if any part is deficient or being stressed/overworked, you will not achieve the desired sound. An efficient buzz is the most resonant and centered!
Some general rules-of-thumb when helping students with their buzz:
- The face should always appear natural (use a mirror).
- The corners are always firm and engaged, but not stretched.
- The aperture is always relaxed – visualize the texture of the lips at the aperture as soft.
▪ Remember the lips respond to the air stream! - A resonant buzz may have some air in the sound.soft.
▪ Think 80% air, 20% lip when initiating and sustaining vibration. - Avoid excess “tension” in the buzz (a closed-off buzz might be clean, but will not be resonant).
- If the sound is bright create more vibrational space at the aperture.
- If the sound is dull create more focus with the air at the aperture.
My favorite buzzing technique that I like to utilize with my students is to slowly buzz simple, familiar tunes on the mouthpiece. In my opinion, this exercise strikes a perfect balance between Arnold Jacobs’ song and wind philosophy and our pursuit of quality tone. Before you begin, establish 4 ground rules:
- Breathe as often as you need air (out of tempo is okay).
- All breaths must be full (100%) – no sip-breaths.
- Move as much air as freely as possible.
- Only focus on the quality of your vibration and pitch (not volume).
*Some simple songs might be: Mary Had a Little Lamb, Happy Birthday, Hot Cross Buns, Silent Night, London Bridge, Twinkle Twinkle/ABC’s – do not be afraid to get creative! Work in different keys, across breaks in their register, or center on specific notes that do not settle well on their instrument, etc.
Another great exercise to develop tone on the mouthpiece is the use of small, quick lip-bends. Younger students generally struggle with playing notes in center, often erring high because of tightness in the aperture. By encouraging the lips and the aperture to relax through the process of lip-bend, it often helps bring them back down into pitch and produces a more vibrant sound. Aperture relaxation is the goal! For example:
- Using a drone or tuner, start a buzz on concert F or the note in question. Quickly (but not recklessly) alternate buzzing down a half-step and returning to the original pitch.
- The next step in the process would be to expand this process to the open harmonic series notes: start on F lip bends, slide down to low Bb lip bends, slide back up to F lip bends, etc.
The popular B.E.R.P. buzzing device, buzz aids, and embouchure visualizers are three low-cost tools you could use to also help develop tone. All of these devices can be used supplementary to the methods above as long as they are are incorporated sensibly into a routine or system.
When you feel ready to pick up the instrument, encourage the students to create the same sense of ease and relaxation they exhibited during the breathing and buzzing. Focus solely on the sound first! Remove the technical, nitty-gritty analysis and encourage them to just listen! Are they happy with it? Do you hear improvement? Evaluate, adjust, and repeat the process.
Quality tone is not something that can be instantly corrected or created. For some, it might be a long road! Encourage patience and build a routine or system that allows the student to make incremental, meaningful changes – you and the student will be rewarded.
Good luck!