Every band director develops their own strategies to start beginning students. I would like to share with you some things that I have found to work for me over the years. It’s my hope you’ll discover something new to try with your students.
Flute
There are many different approaches to beginning flute embouchure. We’ve been using a method called Flute 101 and it offers a great start, suggesting students use only the headjoint for the first few pages. They’re instructed to insert their index finger into the open end to stop or create pitches. This produces an effective starting sound without boring the student to pieces.
Flute Order of Appearance
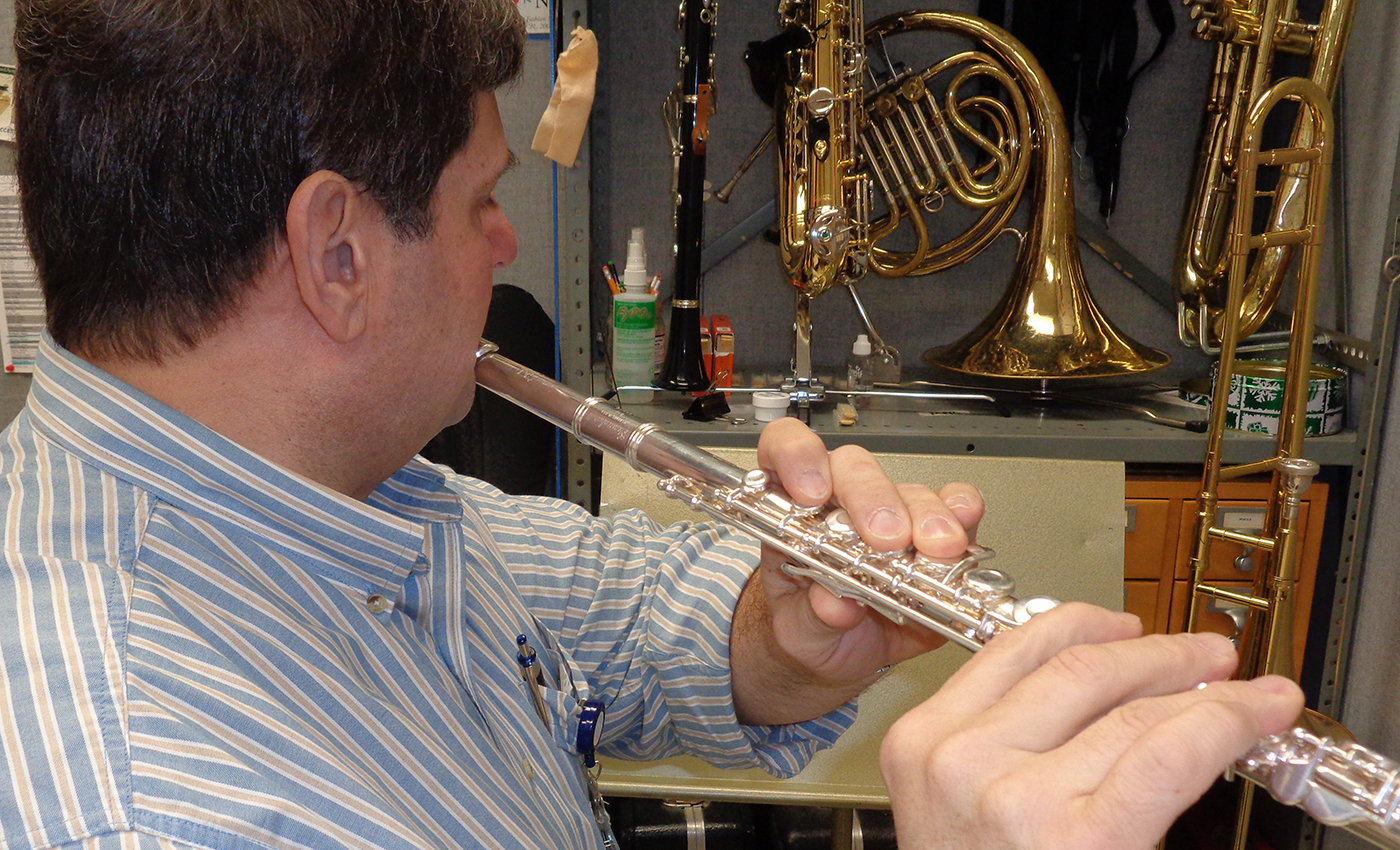
My second favorite flute teaching item is using what I call the Flute Order of Appearance, or FOA. Once a tone is produced and students get into the whole instrument, we typically see a variety of poor holding positions. These include the arm slouched over the back of the chair, the downhill player, the uphill player, etc. To combat this, I help students identify that hands have 5 digits and that the 3 center digits on the hand are labeled fingers. Thumbs and pinkies do something different.
The FOA starts with the flute on the left knee and tilted toward the left shoulder. This position allows the student to see what their hands are doing. Starting from the bottom of the flute, I’ll indicate where the students should place their fingers:
- The right thumb belongs under the flute in-between the first pointer and middle finger (I talk about the “little kid game of I got your nose” for this placement).
- The right pinkie belongs on the first spatula.
- The left hand starts with the pinkie on the G#/Ab key then builds up one finger after another; ring finger, middle finger, skip a key, pointer finger.
- The thumb uses the same “I got your nose” position on the larger of the two bottom keys.
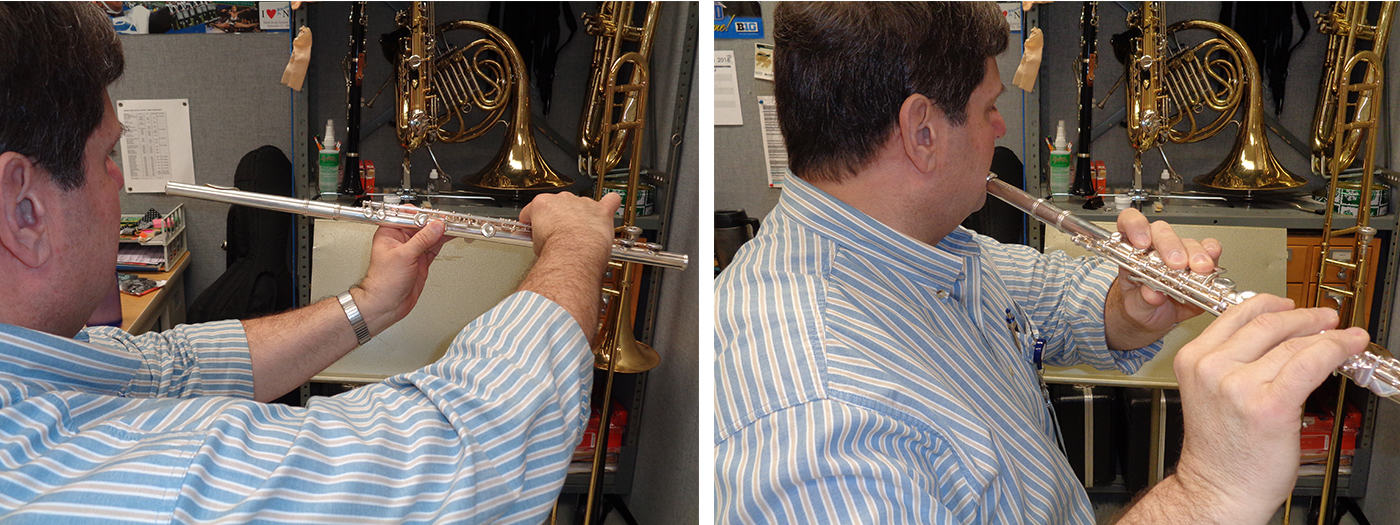
While depressing all the keys down (solid holding position) have students push the instrument straight out in front. This allows for checking of the thumb position.
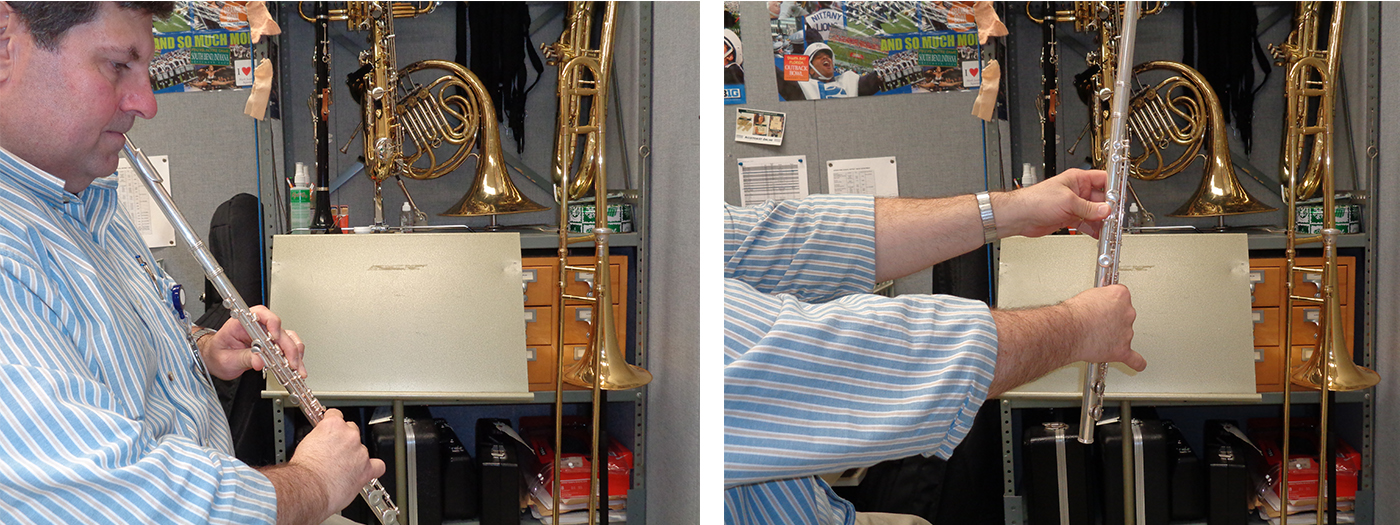
Then have them turn the instrument to the left, shift to the right, lining the tone hole up with the nose, and then bringing it in. I have found that this process sets up the flute for a better holding position than trying to bring it up from a holding position with the student attempting to use the shoulder for support.
I also suggest looking into the purchase of the flute visualizer the Pneumo Pro. When used in front of a mirror, this handy device can assist students and teachers to visualize how the air is being pushed through the instrument. Note that the use of the term “blowing” does not help the embouchure formation; “pushing air” is more consistent with the idea of producing a steady stream.
Clarinet
I begin by explaining the need to use cork grease. I try to have one of the tube type on hand, so I can get a few laughs out of indicating that this is not Chapstick and that if they mistake it for Chapstick it will taste really awful. Then I’ll show how to apply it to corks.
Next we’ll assemble the instrument and barrel, but not the mouthpiece (and all its parts). While students are assembling I have them put a reed in their mouth. We review the parts of the mouthpiece, ligature, and how the barrel has two different sized openings.
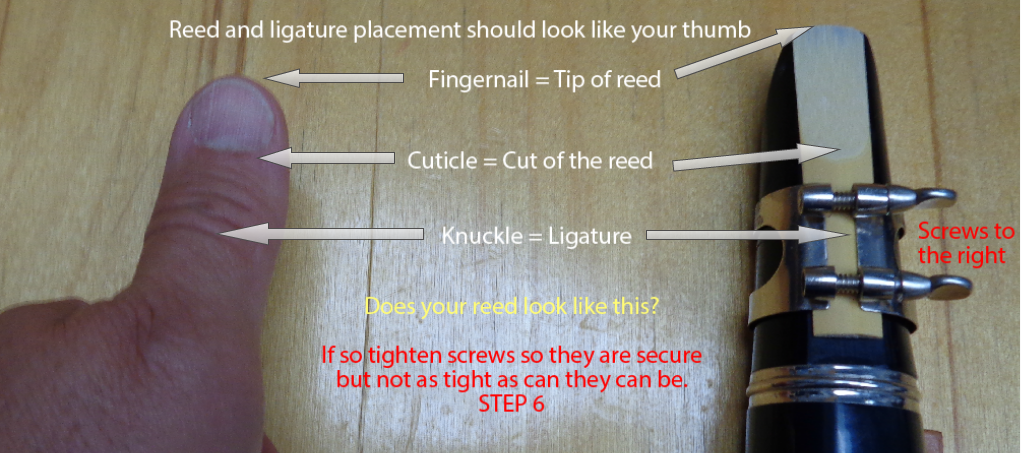
I then explain my “Rule of Thumb:” Looking at their thumbnail I have them visualize that the reed is the thumbnail, the cuticle is the cut of the reed, and the mouthpiece is like the flesh part of the thumb. Furthermore, I suggest the thumb knuckle is like the ligature and indicate that the thumb knuckle is not right next to the cuticle, but is below it.
The next step is to put the mouthpiece on the barrel. This whole part now becomes a handle for them. That way they can avoid putting their hands around the reed. This presents another teaching moment: “When was the last time you washed your hands? Would you eat your lunch off of everything you’ve touched since then? Stay clean – stay healthy!”
We align the flat side of the reed with the flat opening of the mouthpiece. Close it like a door and hold it with our thumb. With the other hand we place the ligature down from the top with the screws to the right, all while looking at your thumb. (While ligature placement opinions vary, I believe that for most beginner clarinets this is a safe approach and consistent with the way the ligatures are made.) Does the reed look like your thumbnail (see a small crescent of flesh behind the nail) and is your ligature below the cut of the reed (your thumb knuckle is below the cuticle)? If so, we begin working to produce a sound on the mouthpiece and barrel.
I have students hold a recycled newspaper bag over the barrel and ask them to try to push (see flute explanation about this terminology) sufficient air through the mouthpiece and barrel to inflate the bag.
We then proceed to placing the mouthpiece/barrel combination together reminding them to use the barrel (not the mouthpiece) to push it on the instrument. Again: stay healthy – stay clean.
Holding Position
As beginners are learning their first note fingerings, I like to use clarinet neck straps to support the weight of the instrument. We talk about what fingers, thumbs, and pinkies do differently.
Another holding idea I learned from a fellow teacher is to pinch the thumb rest while using the left hand for the first notes. Hand position is always an issue and I relate first line E with pinching. (Students are not allowed to go home and say Mr. W. says I need to practice my pinch and proceed to “practice” on a sibling). The motion of the hand is “claw-like” not flat fingered (hand puppet).
Alto Sax
Many of the same principles I use for my beginning clarinet students I also apply to the alto saxophone. Especially in the placement of the reed and mouthpiece on the neck. So often I see students assemble the instrument and then put the reed on the mouthpiece separately. Grabbing the mouthpiece and reed, they then push the combination onto the next. One of two things occur:
- They misalign the reed so they can’t play, or
- They ruin the reed by pushing their hand along the tip damaging the leading edge of the reed.
Of course there is the unspoken third violation – they just put their dirty hand on a clean reed that is going in their mouths! Stay clean – stay healthy.
I utilize the mouthpiece/neck combination as I do the barrel and mouthpiece on the clarinet and the head joint on the flute. This is great a way to determine if the source of the tone is solid and proper. One can also use my improvised “breathing bags” (the plastic bag my newspaper comes in every morning).
I instruct my students to put the neck strap on first and then assemble the instrument. The neck strap can also be confusing. Letting them figure it out before playing can make help. I also have the students clip on to the instrument body and then stand up to feel the weight of the instrument. Then putting on the neck/mouthpiece combination (with the mouthpiece cap on) we go through how to place our fingers, thumbs, and pinkies.
All instruments go through the assembly on a flat surface (floor or chair). I never allow them to do so on their laps. If I see them doing that I remind them laps are not flat surfaces. All instruments are disassembled in the reverse order of assembly. Reeds are always the first things off and placed in the reed case correctly. This lessens the chance for damage to the reed and makes the student think about a process by which they can follow.
Again, even if your approach is very similar (or if you disagree with me on ligature placement), I hope you’ve discovered something new to bring to your students. Next up, brass instruments.