All directors find their own ways to best help their beginning band students get started. As I did in my previous woodwind post, below I’ve shared some beginning brass approaches that have worked for me. It’s my hope that some of these ideas find their way into your classroom, too.
Initially, I teach all beginning brass instruments the same way, using just the mouthpiece. Breath control is the first topic we cover. I use the following steps to help students understand what it means to breathe from the diaphragm:
- Point your index finger in your belly button. (I explain that this is the general location for the diaphragm.)
- Exhale by pushing your finger in.
- Slowly inhale while moving the finger out.
We’ll follow this exercise while counting 4 beats in and 4 beats out. As I mentioned in the woodwind article, I emphasize the use of the term pushing to describe the airflow rather than blowing. It is important to distinguish between these terms for proper embouchure development and breath control.
Embouchure Development
I use what I call the TEAm concept and find that it works well with younger (9-10 year old) beginners. I start by having the students say TEEEEEA. My goal is to have them feel the embouchure muscles pulling back and the motion of the tongue. We have them finish with a short “m” to just close the lips.
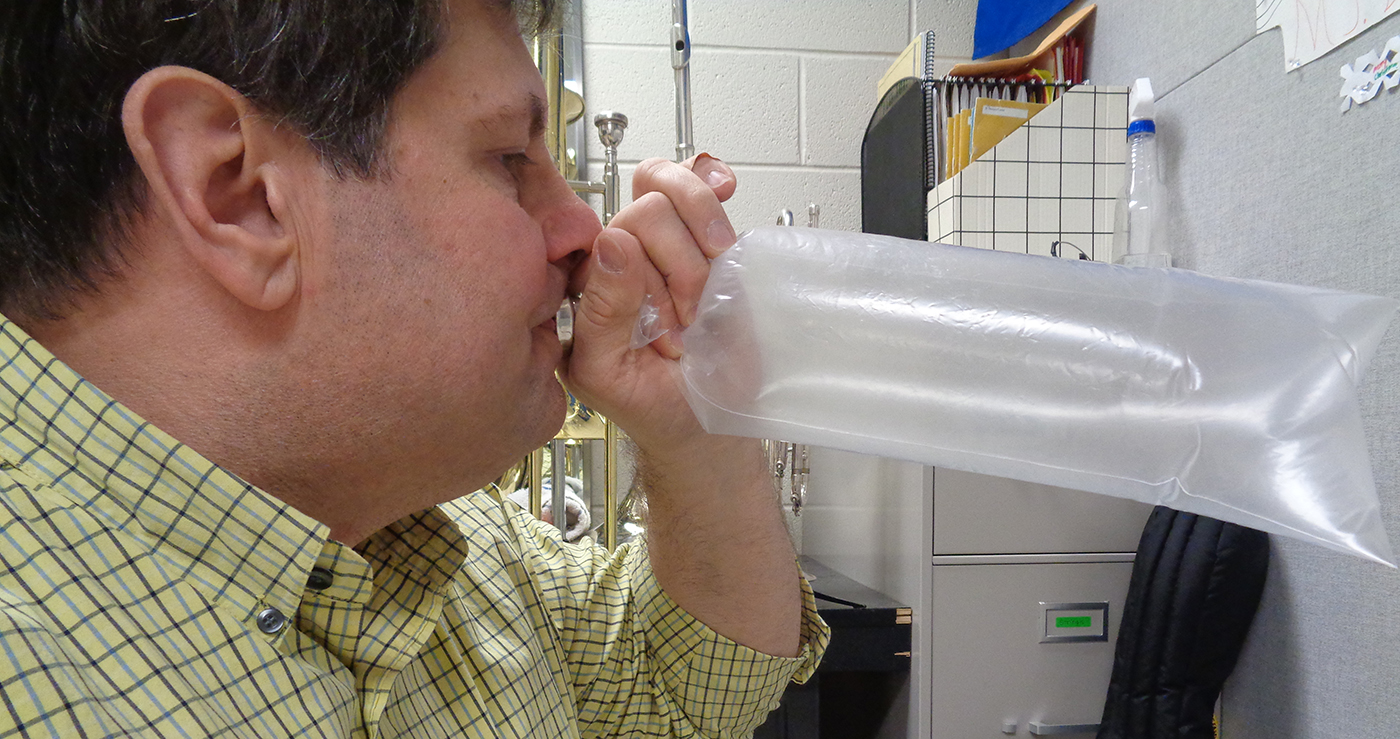
Also in the woodwind post I shared my secret for a low-tech breathing device: I use recycled newspaper bags. First I have my students inflate the bags in one breath. Next they insert the mouthpiece in the end of the bag, close the bag against the shaft, and buzz into the bag to inflate it (as seen above). Keep an eye on their hand placement over the other end of the mouthpiece.
I follow this up by having them buzz a series of mouthpiece exercises. These same exercises can work for woodwinds, too. In my experience, asking students to “buzz into the mouthpiece for 5 minutes,” or “buzz into the mouthpiece before playing” is not as successful as giving them something to do while they buzz.
Below are some instrument-specific tips – that work for me – presented for your consideration.
MakeMusic’s practice and assessment tools will help your beginners build a solid musical foundation from day 1. Start a 30-day free trial today.
Trumpet
In our second lesson we describe how to hold the instrument. I use “the water bottle method.” Students hold out their left hand and act like they are holding a water bottle. While their hand is in that shape I pick up their instrument and place the valve casings into their palm.
The right hand drinks the water bottle (students mimic drinking from a water bottle). The fingers (of the five digits on a hand, the three middle digits are fingers and pinkies and thumbs do other things) are placed on the valve caps. Thumbs go in-between first and second valves, pinkies in (or on top of) the ring.
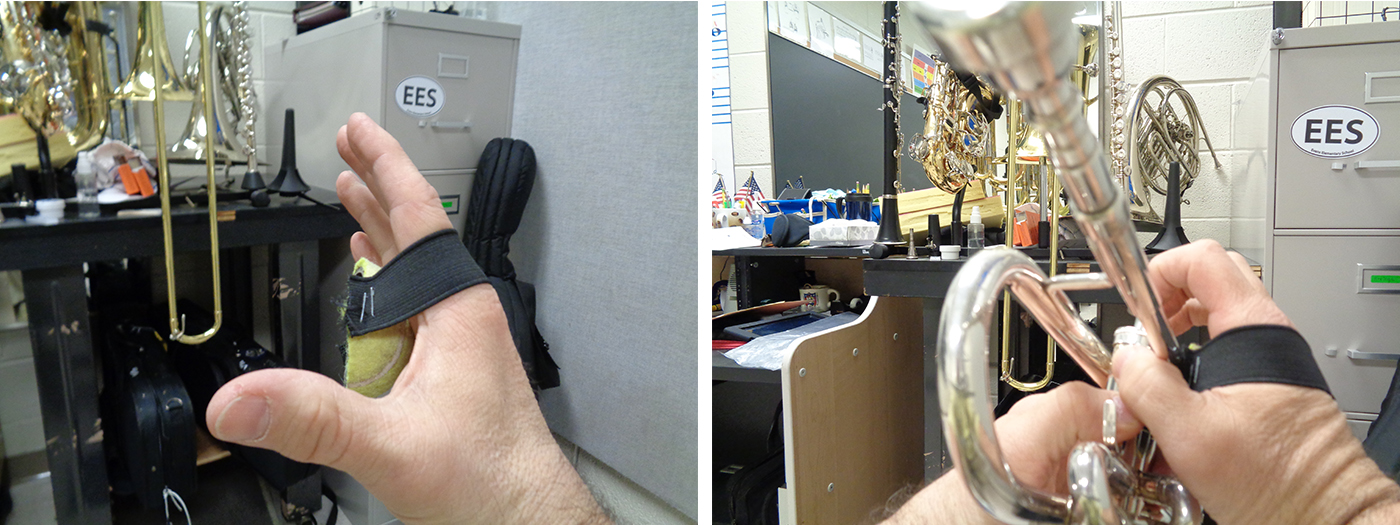
I use the water bottle analogy to reduce flat fingering the valves and to avoid having right thumbs appearing in between the lead pipe and bell. Next year I plan to experiment with a tennis ball to accomplish this. I will cut the balls in half and attach an elastic strap (as shown below). The idea is that the inside of the ball will fit over the 2nd valve slide. The goal is to reinforce the curve of the hand while not allowing the thumb to move out of position.
Trombone
My first instrument was the trombone. I still recall the trouble I had correctly holding the darn thing.
To help my students from being similarly traumatized, I suggest they start by positioning the left hand as if they are about to lift a barbell. This hand goes under the bell brace. The first two digits go on top of the top slide brace and the other two go underneath. I move my players to a traditional holding position by the start of the second marking period.
For the right hand, I have them extend a handshake position, with all digits straight out. Then the fingers make a right angle to (pointing to the left). The hand is then moved under the slide brace to the fingertips. The right thumb is then closed (like a small sock puppet) while the bottom two fingers support the slide.
I also use a tennis ball with my trombone students. First I drill a ½” hole through them. A slit is then cut from the top of the drilled opening to the top of the other opening. Think PacMan (sorry for showing my age). This modified ball is placed on the lower bell section to help support the instrument against the shoulder/neck where the trombone rests reducing the “lifted left shoulder” hold.
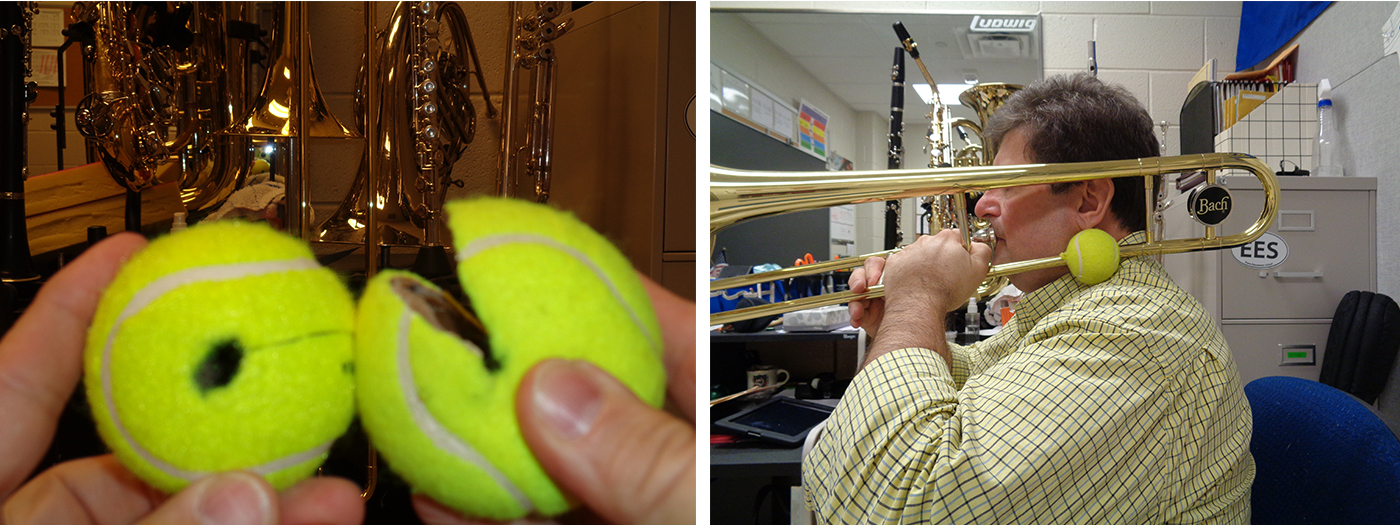
When students put their instruments away, the tennis ball is placed in the bell. When the instrument is taken out of the case, the ball falls out to remind them to use it.
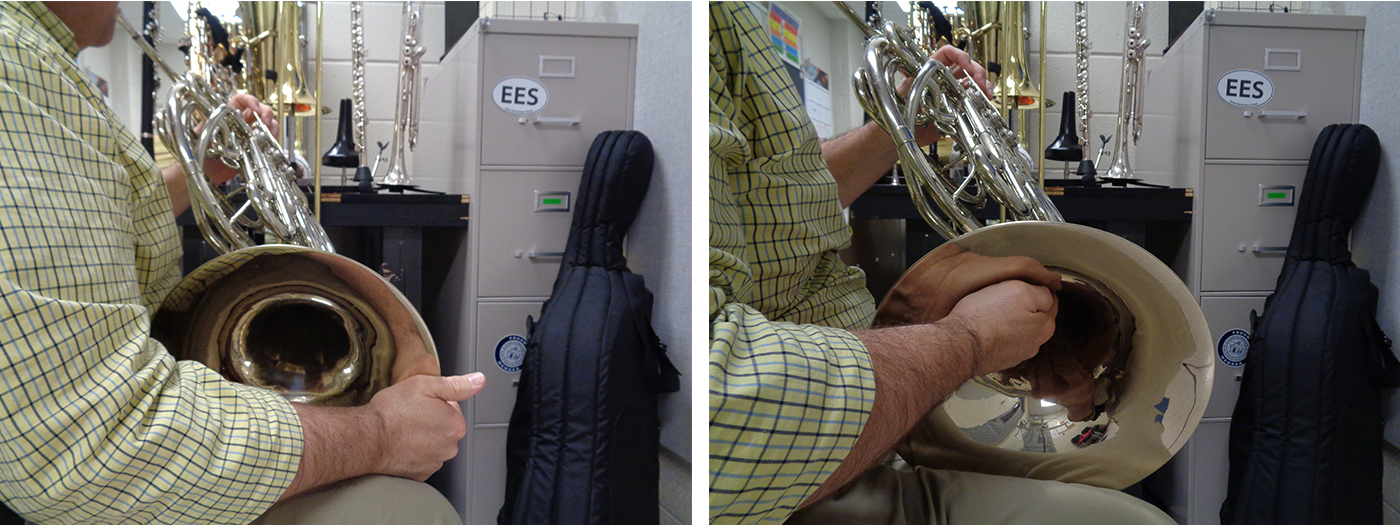
Our school district believes that a solid foundation in baritone and French horn are needed. At one time we did try beginning tuba (actually sousaphone) but the carryover from each level did not warrant this. We transfer students to tuba/sousaphone in the upper grades. Students selecting these instruments are issued one at school and one at home so they only have to bring the mouthpiece and music to school on lesson days.
French Horn
I teach horn like I teach trumpet. Once the mouthpiece tone quality is established I focus in on establishing pitches. We put the lesson books aside and deal with playing in the key of C (Concert F). I believe this key is most ideally suited to the beginning students’ abilities. In my opinion, method books that start with the Key of F (Concert Bb) unnecessarily stretch students’ limits.
I approach holding the French horn a bit differently. I have beginners start by holding the outside of the bell at the 4 or 5 o’clock position and pressing it onto the inside of the right thigh with the right-hand forearm resting on the top of the thigh. We move into the traditional holding method mid year.
Baritone
We utilize ¾ sized baritones. Full-sized instruments are too big for first-year players. The full-sized baritone makes them reach up to the mouthpiece while the ¾ sized ones fit better.
I teach baritone very much like the trumpet. While I reinforce bass clef reading first, if I transfer some trumpet players mid year, they will read treble clef baritone parts.
The biggest issue for most students is the distance between the lap and embouchure. I use different thicknesses of foam to fill any gaps that can occur. Rolled up towels also work well; I suggest this use for working at home.
Over the years, every director develops their own ways of doing things. I share my approach with the hope that you might try some of what has worked for me as you refine what best works for you.